
Chapter 13
Catalog and layers
The catalog is the list of all the layers in the system: the reference layers that you upload (boundaries, protected areas, land cover) and the snapshots. From it you upload a new layer, complete its metadata record, give it a style, and publish or withdraw it. This chapter is for those who manage data; it requires the corresponding permissions (for example, “View the catalog”, “Upload data”, “Edit records”, “Publish and withdraw” and “Manage styles”).
The catalog list
In the menu, under the “Data” group, open “Layer catalog”. At the top you have the search box (by title, summary or technical name) and the “Status” filter. For each layer the table shows the title, the technical name, the type (vector or raster), the geometry, the number of records, the status, the “Loaded on start” option, the record and the actions.
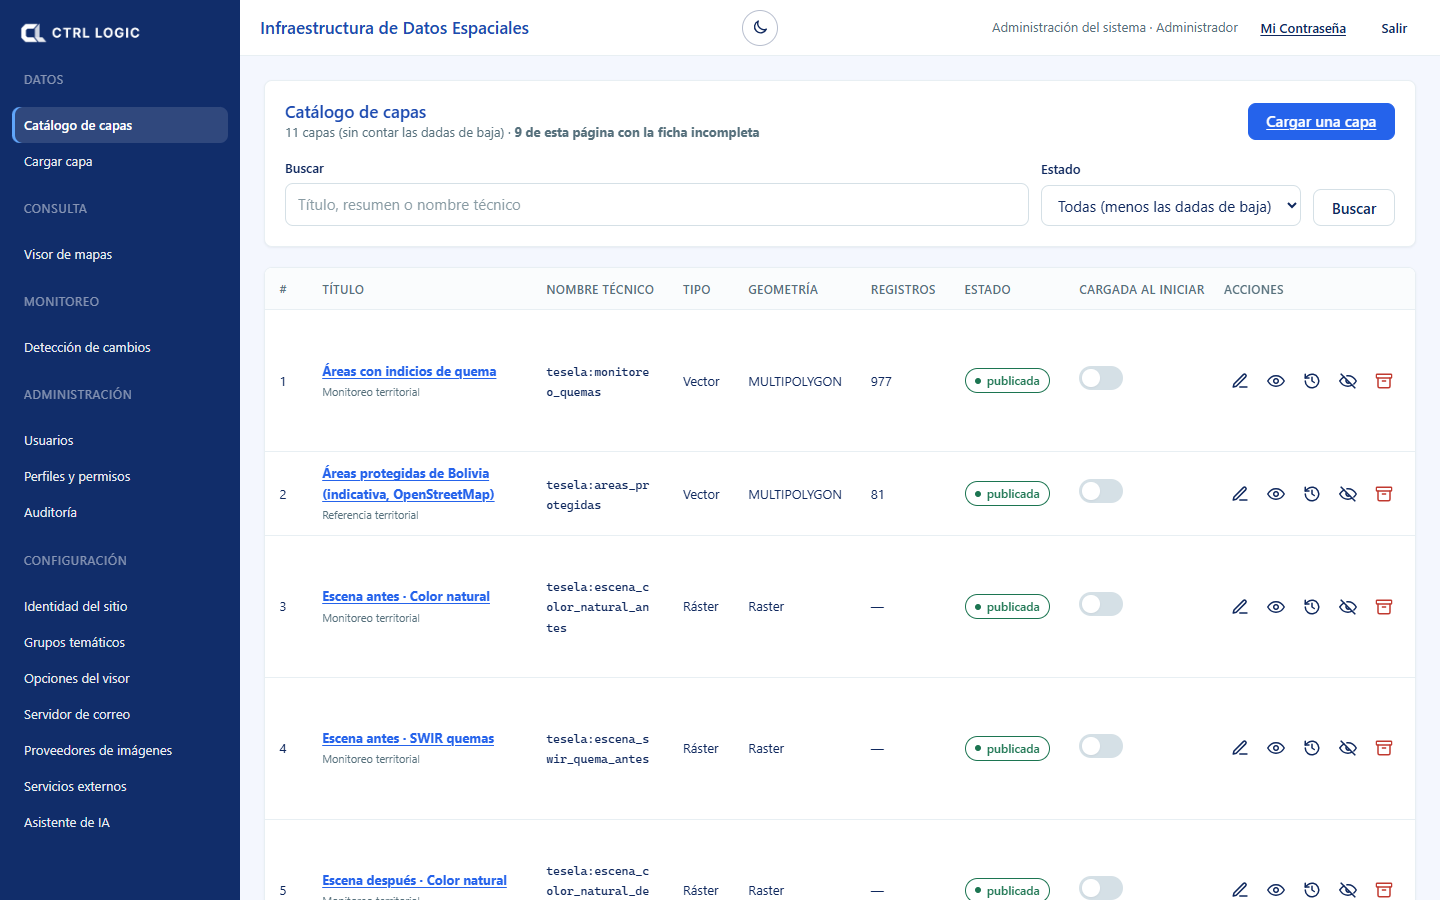
Layer statuses
| Status | What it means |
|---|---|
| Draft | Uploaded but not visible in the viewer. It is the status in which every new layer, and every restored layer, is left. |
| Published | Visible in the viewer and in the WMS services (and WFS if it is vector). |
| Withdrawn | It is no longer shown in the viewer, but the data remains in the database: nothing has been deleted. |
| Archived (decommissioned) | It leaves the usual list and is found by choosing the “Archived” status. Its data is retained and its technical name remains reserved. |
An “internal” layer (label next to the status) is visible only when signed in. A layer without a thematic group cannot be published: the “no group” mark appears.
Complete or incomplete record
Each layer has an ISO 19115 metadata record. The “Record” column marks it “complete” or “incomplete” and indicates what is missing (“Incomplete: missing contact”). Completing it is what distinguishes a map server from a data infrastructure: whoever finds the layer will know what it is, where it comes from and how it can be used. The catalog tells you how many records on the page are incomplete.
Actions per layer
- Edit record: title, summary, group, ISO category, data date, lineage, use restrictions, license, contact and keywords. If your profile does not allow editing, you see “View record”.
- Preview: map and legend generated by GeoServer. It exists only for published layers.
- Audit: who uploaded it, last modification and last publication; the full change history requires the “View audit trail” permission.
- Publish / Withdraw from the portal: makes the layer visible or hides it from the viewer.
- Decommission: archives it. The confirmation dialog details what happens: it is no longer shown, it leaves the list and its data is retained.
- Restore: undoes the decommissioning; the layer returns as a draft and must be published again.
The internal monitoring layers (scenes, detections, hotspots) are not decommissioned from the catalog: they hold the results of all analyses and are shared. Analyses are archived or deleted under “Monitoring” (the “Archive” and “Delete” buttons in the analysis panel).
“Loaded on start”
The “Loaded on start” switch turns the layer on automatically when the viewer opens. It works only on published layers; on a withdrawn layer “no effect” appears. Use it with few layers: those that everyone needs to see on entering.
Uploading a layer
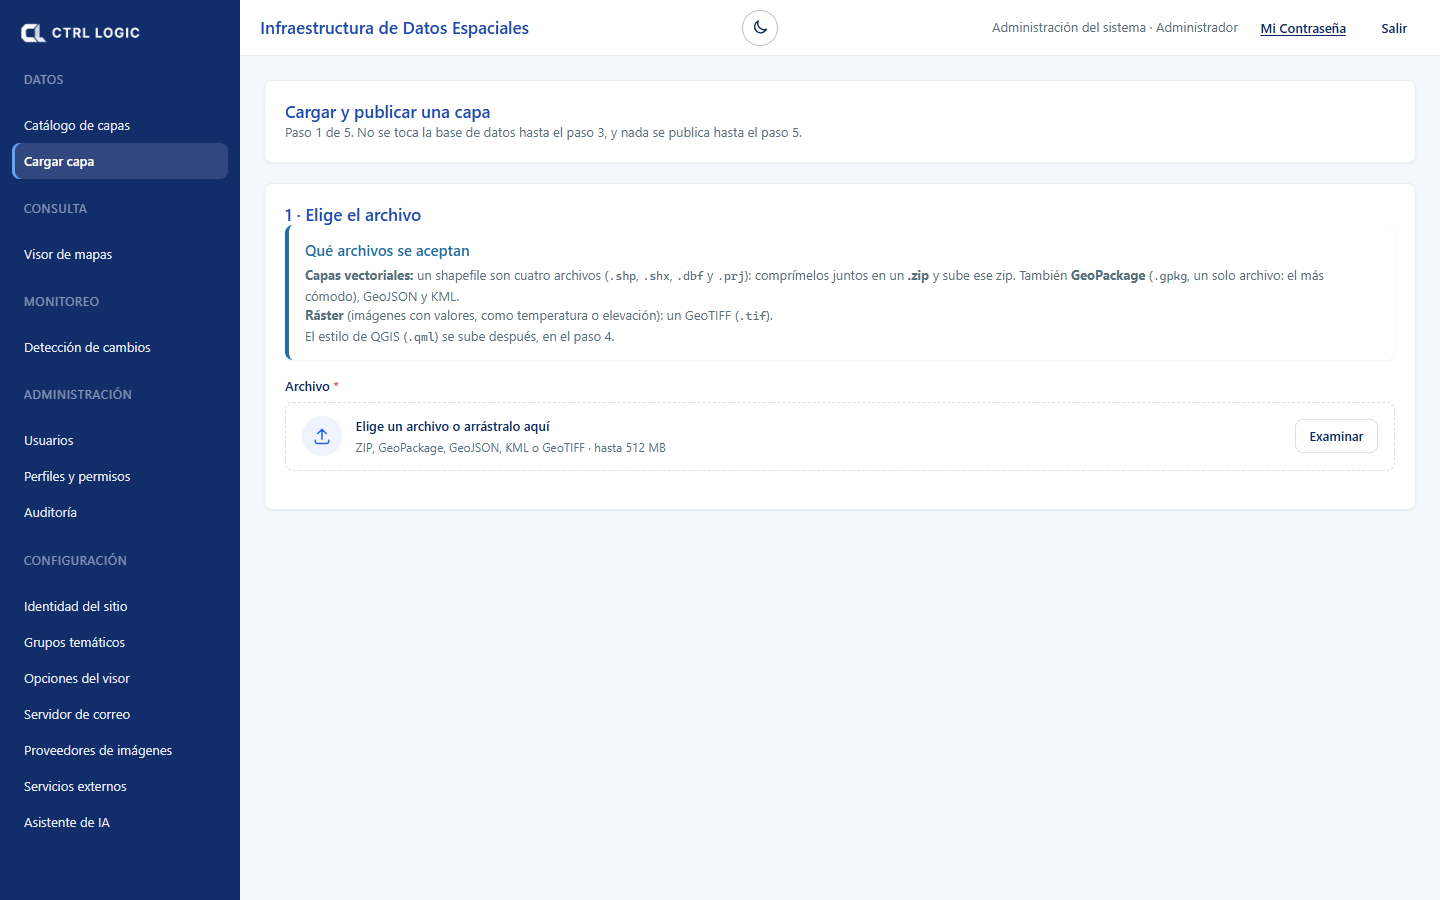
Click “Upload a layer” or open “Upload layer” in the menu. The wizard advances in five steps; the database is not touched until step 3 and nothing is published until step 5.
- Choose the file. Vector layers: a shapefile compressed in a .zip (with .shp, .shx, .dbf and .prj), a GeoPackage, GeoJSON or KML. Raster: a GeoTIFF. Maximum size 512 MB.
- Confirm the projection. If the file does not declare its coordinate system, Tesela assumes none: choose it yourself, because a wrong projection places the layer in the wrong location without giving any error. Enter the technical name (lowercase letters, numbers and underscores, 3 to 63 characters) and click “Import into the database” (or “Import the raster”).
- Review the result. Invalid geometries are shown, if there are any, with the “Fix automatically” option, and the layer is checked to ensure that it lies within Bolivian territory.
- Describe the layer. Complete the record: title, summary (at least 20 characters), group, ISO category, lineage, restrictions, contact and who will be able to see it (“Public” or “Internal”). Click “Save record”.
- Publish. “Publish the layer” registers it in GeoServer; it appears on its own in the viewer and in the WMS services (and WFS if it is vector).
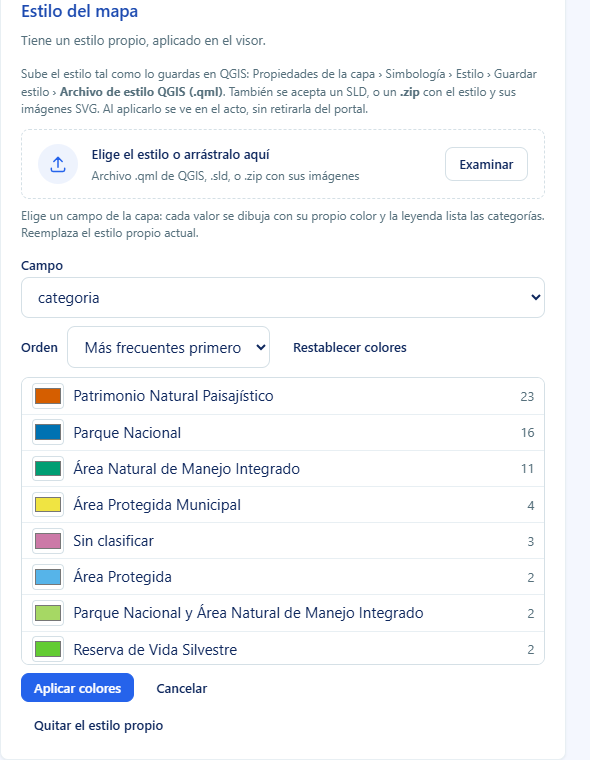
Style: how a layer is drawn
In the layer record, the “Map style” block lets you upload a QGIS style (.qml), an SLD or a .zip with the style and its images. You can also color by a field, without needing QGIS:
- Click “Color by field” and choose a “Field” of the layer.
- The values are listed with their frequency and an editable color for each. Change the “Order” (most frequent first or alphabetical) or “Reset colors”.
- Check the legend preview and click “Apply colors”. If the field has many distinct values, the most frequent ones are shown and the rest is drawn as “Other”; a field with few values is advisable.
If the layer is published, the style is visible immediately. If it is a draft, it is applied on publication. “Remove the custom style” restores GeoServer’s generic style.
Summary
- The catalog lists layers with their status: draft, published, withdrawn or archived.
- The ISO 19115 record must be complete; the catalog flags incomplete ones.
- Actions: edit record, preview, audit, publish or withdraw, decommission and restore.
- “Loaded on start” switches the layer on when the viewer opens.
- The internal monitoring layers are not decommissioned here: analyses are archived or deleted under “Monitoring”.