
Chapter 9
Drone mission
The mission planner turns an area that you draw on the map into a photographic flight plan: sweep lines, number of photos, distance, time and batteries. It is used to verify in detail, with a drone, an area that the satellite flagged as an indication. Tesela does not control the drone: it generates files that you load into the manufacturer’s app or into QGroundControl.
The plan figures are indicative estimates. The files have not been tested on a real drone: validate them in the simulator or in the manufacturer’s app before flying. The operator is responsible for the flight and for the authorizations and rules of their country; Tesela neither verifies nor manages them.
Opening the planner
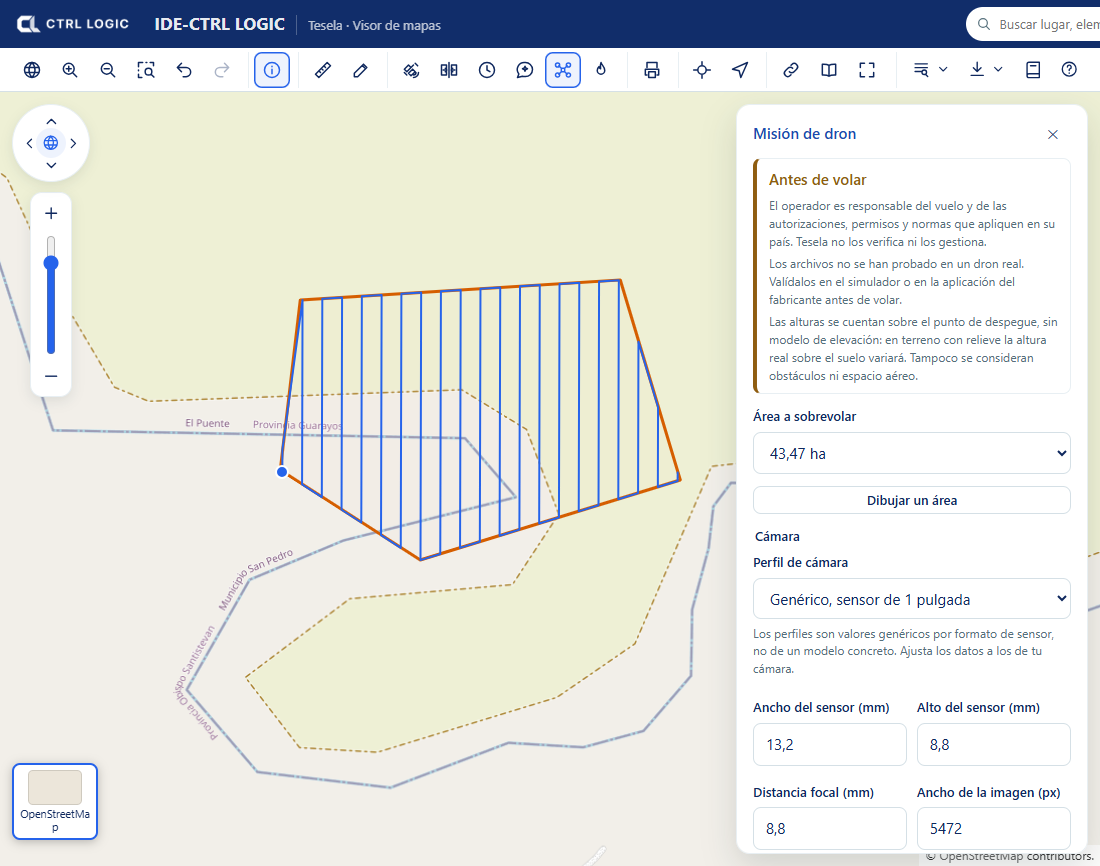
On the viewer toolbar, click the “Drone” button (its help text reads “Plan a drone mission over an area”). The “Drone mission” panel opens with the “Before flying” notice. Read it: it reminds you that heights are counted from the takeoff point, without an elevation model, and that obstacles and airspace are not taken into account.
If you do not see the button, the administrator has left it hidden or reserved for signed-in users (see the chapter “Settings”).
Drawing the area and planning
- Click “Draw an area” and trace a polygon or a circle on the map. Clicking the button while you are drawing (“Drawing… (click to cancel)”) cancels the trace.
- Under “Area to fly over”, choose the drawn area. The flight lines appear on the map immediately.
- Choose a “Camera profile” (1-inch sensor, 4/3, 1/2.3-inch or “Custom”) and adjust the data to those of your camera: sensor width and height, focal length and image resolution. The profiles are generic values per sensor format, not for a specific model.
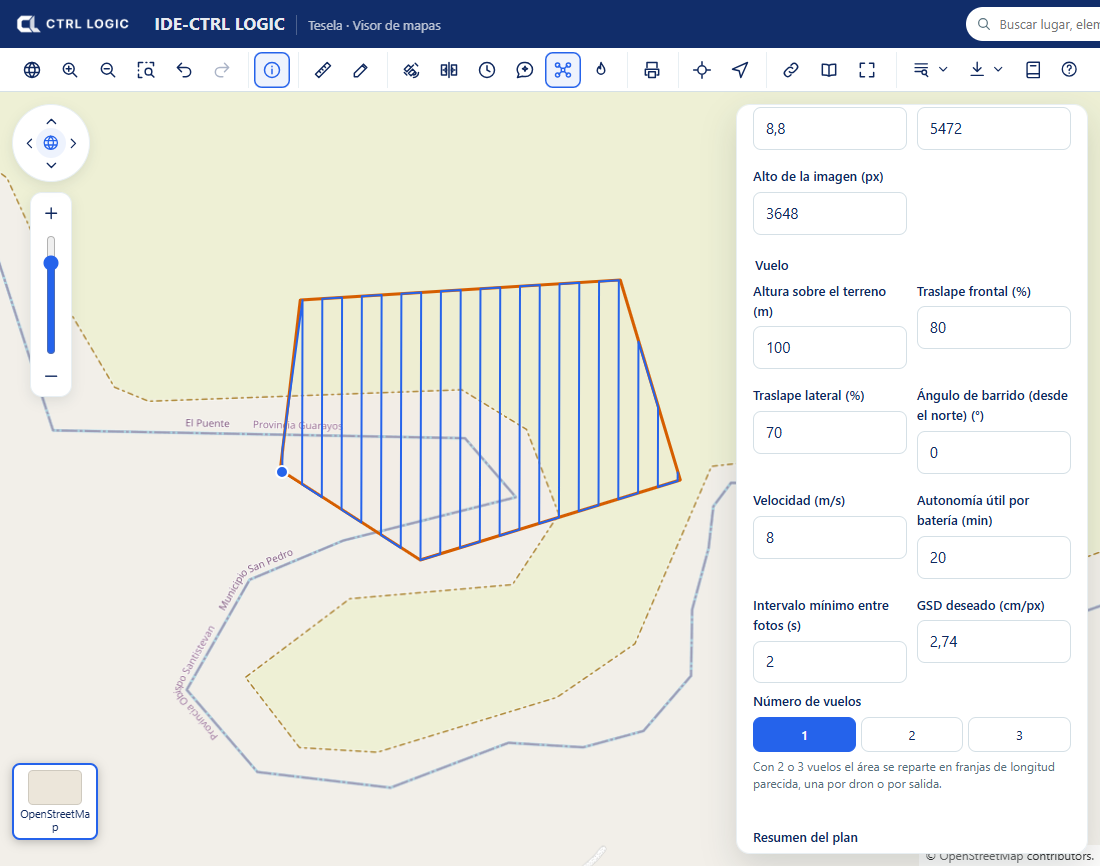
- Define the flight: “Height above ground”, “Front overlap” and “Side overlap”, “Sweep angle (from north)”, “Speed”, “Usable endurance per battery” and “Minimum interval between photos”.
- If you prefer, enter the “Target GSD” (centimeters per pixel): the panel recalculates the height that produces it. Height and GSD are linked.
- Choose the “Number of flights” (1, 2 or 3). With 2 or 3 flights the area is split into strips of similar length, one per drone or per sortie.
Reading the plan summary
The “Plan summary” block shows the area, the GSD, the footprint of one photo, the spacing between lines, the distance between photos, the sweep lines, the number of photos, the total distance, the estimated time and the batteries required. If you split the area into several flights, the “Missions” section details each one (photos, kilometers, time and batteries).
The panel warns you when something does not add up. For example, if at the chosen speed the camera would have to shoot faster than its minimum interval, it suggests lowering the speed or the front overlap. It also rejects plans outside the limits: a maximum of 1,000 ha per plan and 5 km along the longer side of the area. A drone does not cover a territory: draw only the zone you are going to fly over and split large areas into several plans.
Exporting
Each mission has two download buttons:
| Button | What it is for |
|---|---|
| “DJI (KMZ)” | Route file for DJI’s flight app. |
| “QGroundControl (.plan)” | Mission plan for QGroundControl. |
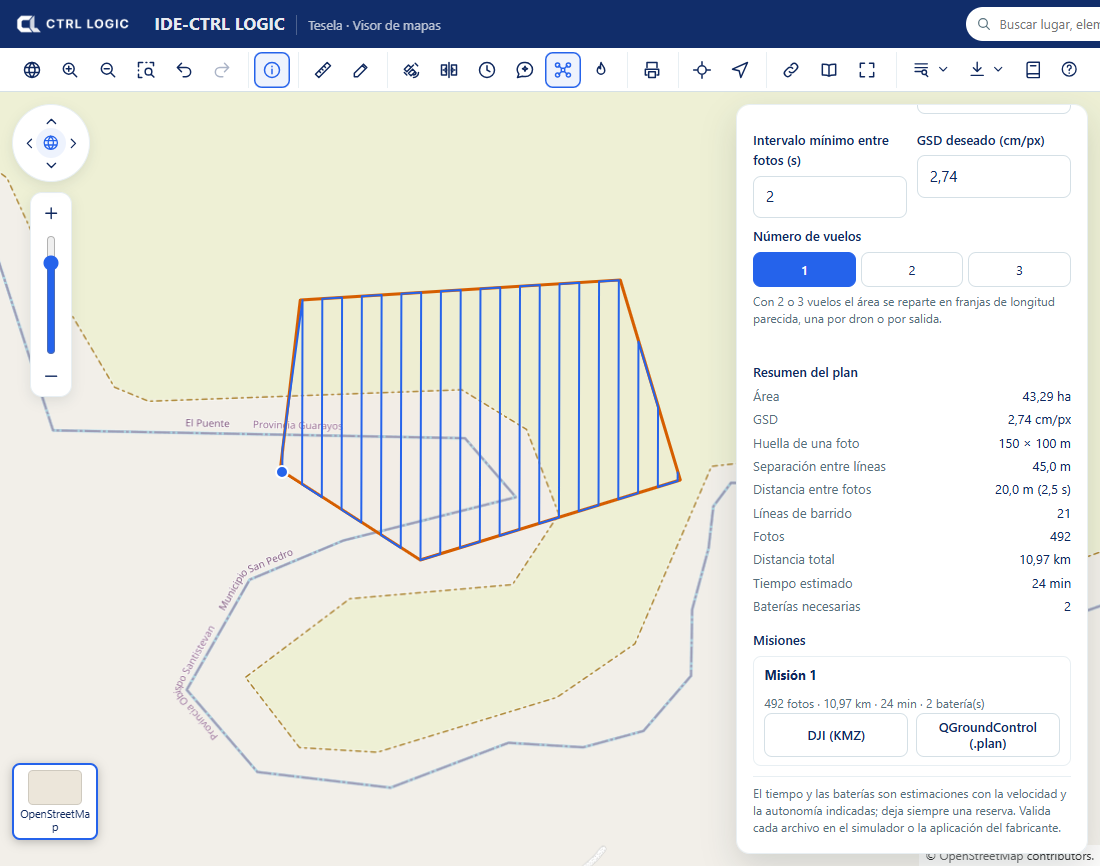
Always keep a battery reserve. Time and batteries are calculated from the speed and endurance you entered; if those figures are optimistic, the plan will be too.
Summary
- Draw the area, adjust camera and flight, and read the plan summary.
- Split the area into up to 3 flights if necessary.
- Export to DJI (KMZ) or QGroundControl (.plan) and validate in a simulator before flying.
- The estimates are indicative; responsibility for the flight lies with the operator.